
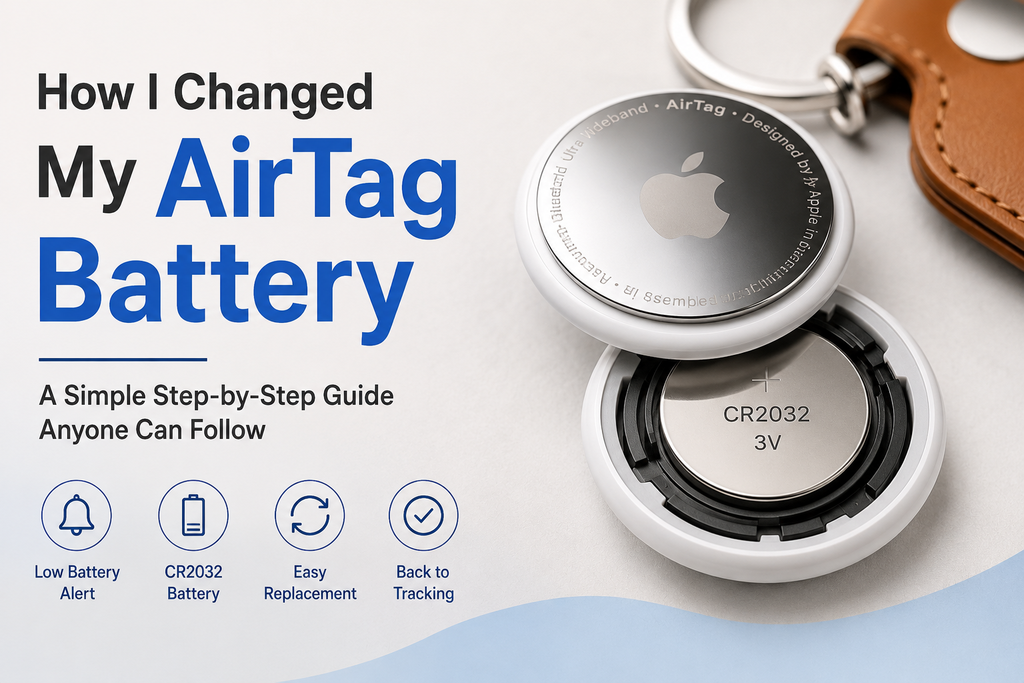
My AirTag had been working quietly for almost a year when I started receiving a low-battery notification on my iPhone. Since I use my AirTag to keep track of my belongings, I didn’t want to wait until the battery completely died.
I checked the battery information and found that replacing an AirTag battery is actually very simple. I didn’t need any special tools, and the entire process took me only a few minutes.
In this guide, I’ll explain exactly how I changed my AirTag battery, which battery I used, what happened after installing the new battery, and what to do if your AirTag doesn’t make a sound after the replacement.
How to Check Airtag Battery
AirTag doesn’t have a rechargeable battery that needs to be connected to a charger. Instead, it uses a replaceable CR2032 lithium coin-cell battery.
After roughly a year of normal use, my iPhone displayed a low-battery warning for the AirTag. This was my indication that it was time to replace the battery.
If you have an AirTag, you can check its battery status through the Find My app. I opened Find My, selected the Items tab, and tapped my AirTag. When the battery is running low, Apple displays a Low Battery message.
Which Battery Did I Use?
For my replacement, I used a CR2032 3V lithium coin-cell battery.
This is a very common battery, so it is generally easy to find in electronics stores, supermarkets and other retailers. However, I made sure to choose a battery that is suitable for AirTag.
Some CR2032 batteries have bitter-tasting coatings designed to discourage children from swallowing them. These coatings can sometimes interfere with electrical contact in certain devices. If you’re buying a replacement specifically for an AirTag, it’s a good idea to look for packaging that indicates compatibility with AirTag.
How I Replaced My AirTag Battery
The actual replacement was surprisingly easy. Here’s exactly what I did.
Step 1: I Held the AirTag Correctly
First, I picked up the AirTag and held it with the polished stainless-steel side facing upward.
The stainless-steel side is the shiny metal portion of the AirTag, while the other side contains the white plastic section.
Step 2: I Removed the Battery Cover
I placed my fingers on the metal battery cover and pressed down firmly.
While keeping pressure on the cover, I rotated it counterclockwise.
I continued rotating it until the cover stopped moving.
This released the cover from the AirTag.
Step 3: I Removed the Old Battery
Once the cover was loose, I lifted it away from the AirTag.
I could then see the coin-cell battery inside.
I removed the old battery carefully and set it aside for proper recycling.
Step 4: I Inserted the New CR2032 Battery
Next, I took my new CR2032 battery and placed it inside the AirTag.
The important thing here is the battery orientation.
I positioned the battery with the positive (+) side facing upward.
Once the battery was correctly positioned and made contact, my AirTag produced a short chime.
That sound was useful because it confirmed that the AirTag was receiving power from the new battery.
Step 5: I Put the Cover Back On
After confirming that the new battery was working, I put the metal cover back onto the AirTag.
There are three small tabs on the cover. I aligned these tabs with the corresponding slots on the AirTag.
I then pressed the cover down gently and rotated it clockwise.
I continued turning it until it stopped.
After that, the cover was sitting flush against the AirTag and felt securely locked into place.
Did I Need to Pair the AirTag Again?
No.
This was one of the things I wondered about before replacing the battery, but there was no pairing process required.
After installing the new battery, my AirTag continued working normally. I didn’t have to remove it from my Apple ID or go through the setup process again.
The AirTag automatically continued working with my existing setup.
What If Your AirTag Doesn’t Make a Sound?
My AirTag made a sound immediately after I inserted the new battery. However, if yours doesn’t, there are a few things I would check.
First, remove the battery and make sure the positive (+) side is facing upward.
Then reinstall the battery and make sure it is seated properly.
If there is still no sound, try another CR2032 battery. Not every coin-cell battery necessarily makes perfect contact in every device.
I would also make sure the battery cover is properly positioned and locked.
If the AirTag still doesn’t respond after trying a known-good battery, the issue may not be the battery itself.
Airtag Battery Life
In my experience, an AirTag battery is something you generally don’t have to think about very often.
Apple designed the AirTag to provide approximately one year of battery life under typical use. Actual battery life can vary depending on how the AirTag is used.
Features such as Precision Finding, playing sounds and frequent location-related activity can affect battery consumption.
Fortunately, you don’t have to constantly check the battery. Your iPhone can notify you when the AirTag battery is getting low.
How I Check the AirTag Battery Status
If I want to check my AirTag, I open the Find My app on my iPhone.
I then:
- Tap Items.
- Select the AirTag I want to check.
- Look underneath the AirTag’s name for its battery status.
When the battery is getting low, a Low Battery notification appears.
This is particularly useful if you’re relying on the AirTag for something important, such as luggage, keys or another frequently used item.
What I Did With the Old Battery
I didn’t throw the old CR2032 battery into my regular household garbage.
Coin-cell batteries should be handled carefully because they can be dangerous if swallowed, especially by children and pets.
I kept the old battery somewhere secure until I could dispose of it according to local battery-recycling or disposal guidelines.
If a battery-recycling collection point is available in your area, that’s a better option than putting the battery in regular household waste.
My Experience Replacing the AirTag Battery
Before I opened the AirTag, I expected the battery replacement to be more complicated than it actually was.
The entire process was straightforward:
Open the cover → remove the old battery → insert the new CR2032 → listen for the chime → close the cover.
The most important things I paid attention to were the battery type and orientation. The new battery needs to be a compatible CR2032 lithium 3V coin cell, and I installed it with the positive side facing up.
I also made sure the metal cover was securely locked after replacing the battery.
My Thougts on This
Changing my AirTag battery turned out to be one of the easiest maintenance tasks I’ve had to do with an Apple device.
I didn’t need a screwdriver or any other special equipment. Once I had the correct CR2032 battery, the replacement took only a few minutes.
If your iPhone shows a Low Battery warning for your AirTag, there’s usually no reason to panic. Simply get a compatible CR2032 battery, open the back of the AirTag, replace the old battery, and secure the cover again.
The short chime after installing the battery is a useful confirmation that the AirTag has received power. After that, the AirTag should continue working without requiring you to pair or configure it again.
For me, the biggest takeaway was simple: don’t wait until the AirTag stops working completely. If your iPhone gives you a low-battery warning, replacing the battery early is quick, inexpensive and easy to do at home.